Metadata, or "data about data", is probably the least fun thing about GIS mapping. However, it can be the most important. Essentially, it tells the user what the points, lines and polygons or raster represent. It’s a good practice to make metadata about each layer you create.
The importance of metadata, from the Wyoming Geographic Information Center:
• Protects investment in data:
o mitigates effect of staff turnover and individual memory loss
o sets the stage for data re-use and update
o provides documentation of data sources and quality
• Helps user understand data:
o provides consistency in terminology
o focuses on key elements of data
o helps user determine the data’s fitness for use
o facilitates data transfer and interpretation by new users
• Limits Liability: can prevent data from being inappropriately used or provides protection if data is inappropriately used
• Evidence of prudent data stewardship: an organization that takes the time to create and maintain quality metadata will also mostly likely take the time to develop good quality, clean data
• Reduces workload associated with questions about data: users don’t have to keep asking producers questions
• Cuts overall costs: allows automation of tools which ease overall burden and cost of data population and maintenance
At a minimum, it’s important to include the following points:
• What is this?
• Who made this?
• When was it made? How was it made?
• What is the accuracy – spatial, temporal, attribute
• How often is it updated?
• Description of every attribute field and how it was populated.
• Can I use it? What are limitations on what I can use it for?
Metadata is most useful when it is correct, consistent and maintained.
You can use ArcCatalog’s metadata editor, your department’s standard metadata tool, or you can use a simple ReadMe.txt file in the same folder as your data. These instructions will use the Three Tab Metadata editor, which is a free, easy-to-use editor from the Coeur d’Alene Tribe in Idaho.
Please visit this website: http://gis.cdatribe-nsn.gov/ThreeTabMetadataEditor/#DownLoad to download the editor and for installation instructions.
Note: These instructions are from the Coeur d’Alene website.They have been reproduced here for your convenience.
Tutorial: How to use the Three Tab Metadata Editor
1. Open ArcCatalog.
2. Click Tools, then select Options.
3. In the Options dialogue box, click the Metadata tab.
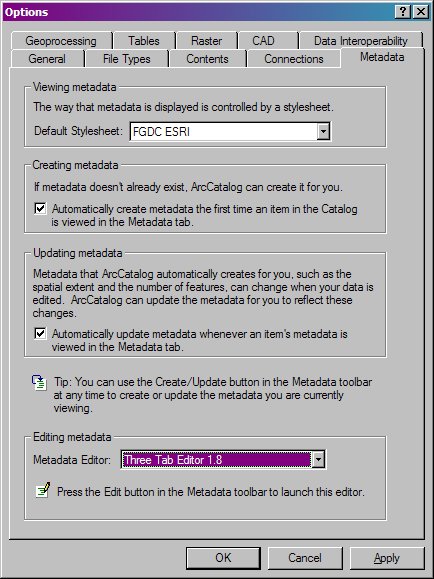
4. Select the "Three Tab Editor" from the Metadata Editor pick list. Click OK.
5. Click on the dataset that needs metadata and then select the metadata tab.
6. Click on the Update button![]() to automatically harvest some metadata information from the dataset.
to automatically harvest some metadata information from the dataset.
7. Click on the Edit Metadata button![]() to bring up the Three Tab Editor.
to bring up the Three Tab Editor.
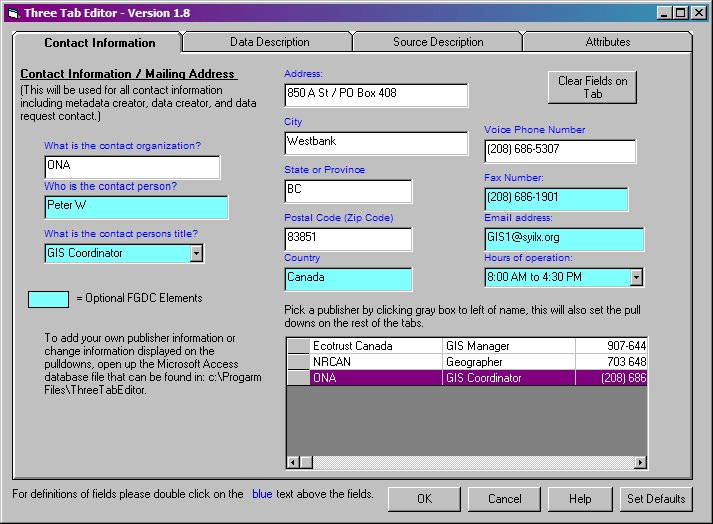
8. Complete all the desired fields in the Contact Information tab by either typing in the field or using the pull down menu to populate the fields.
.jpg)
9. Complete all the desired fields in the Data Description tab by either typing in the field or using the pull down menu to populate the fields.
.jpg)
10. Complete all the desired fields in the Source Description tab by either typing in the field or using the pull down menu to populate the fields.
|
TIP: If you are unsure of how to complete a field you can click on the blue text. Your default web browser will open and go to the USGS Biological Resource "An Image Map of the Content Standard for Digital Geospatial Metadata" web site and provide you information for that field. TIP: You can edit the metadata.mdb found in C:\ProgramFiles\ThreeTabEditor. This will change the defaults that appear in the editor. |
Tutorial: How to create metadata for attributes
1. From the Editor, click the Attributes tab.
.jpg)
2. The box on the left is populated with all attributes in the data set. Delete the items for which you do not want to create metadata. Select them from the list and then click the Delete Selected Items button. If you accidentally delete an item, press the Reload Items button and all the items will be reloaded from the data set.
3. Metadata for attributes are divided into three levels of detail:
“Edit Attribute Name Definitions”: Lowest level of detail. Allows you to define what each attribute column in the dataset represents for each item you have in the textbox to the left of the button. For example, you may have a vegetation layer with two attributes; vegetation_type, and acres. This button would allow you to define each of these fields with a sentence.
“Create Statistics for Numeric Items and Derive Domains for Character Items”:
Medium level of detail. This button goes through each item you have chosen in the list and dependent upon its data type does one of two things. If the item is a “Character String” data type then it goes through every record and comes up with unique occurrences for those items. For example if you had an item called vegetation_type it would derive all the potential values found in it (e.g. forest, grass, water…). If the item is composed of numeric values, then a simple statistical summary is created for the item (e.g. Mean, Max, Min). For large datasets the creation of this information may take several minutes.
“Enter Definition of Values Found in Each String Type Attribute”: Highest level of detail. This button only works with the “Character string” data types. You first should just make the text box on the left show just one or two attributes you wish to work through. Once you press the button it will prompt the user for the definition of a value found in that attribute (i.e. a domain of that attribute). This process will continue until you have defined all the potential values within that attribute. For example, if you choose to work on the item called vegetation_type, the program would prompt you for a definition of “forest”, then a definition of “grass”, and lastly a definition of ”water”. Of course most of the time attribute values aren’t as descriptive as grass, water and forest.
4. Choose the minimum amount of detail you wish to enter for your data. Click on the appropriate button and enter the data.
5. Click OK to save your edits to the dataset.